
 Save
Save
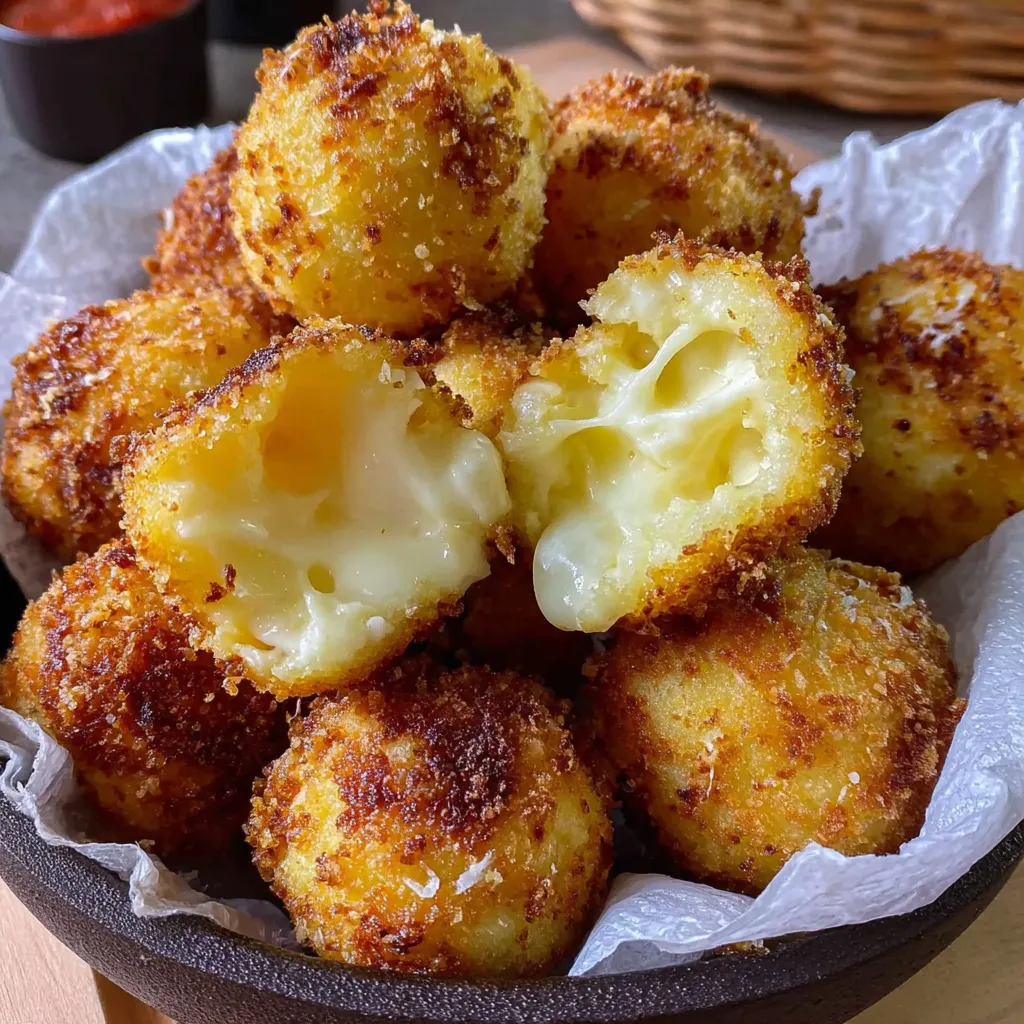
This golden-brown cheese ball recipe has been my crowd-pleasing secret weapon for years. Crispy on the outside with an irresistibly gooey center, these little bites of heaven disappear faster than I can make them at every gathering.
I first made these cheese balls for a last-minute game day gathering when I had limited ingredients. They were such a hit that they've become my signature appetizer, with friends now requesting "those amazing cheese balls" whenever I host.
Ingredients
- 1 cup shredded cheddar cheese freshly grated provides better melting and flavor than pre-shredded options
- 1 cup shredded mozzarella cheese adds that perfect stretchy pull when bitten into
- ½ cup all-purpose flour creates the first layer of the triple-coating system
- ½ cup breadcrumbs preferably panko for extra crispiness
- 2 large eggs at room temperature for better adhesion
- ¼ teaspoon garlic powder adds subtle savory depth
- ¼ teaspoon onion powder complements the cheese flavors beautifully
- ¼ teaspoon paprika provides color and mild sweetness
- Salt and pepper to taste be generous with fresh-cracked pepper
- Vegetable or canola oil for frying choose one with a high smoke point
- Optional marinara or ranch for dipping both complement the cheesy flavor perfectly
Step-by-Step Instructions
- Combine Cheeses
- Mix the shredded cheddar and mozzarella thoroughly in a bowl until well integrated. The combination of these two cheeses creates the perfect balance of flavor and meltability. Make sure your cheese is at room temperature for easier mixing.
- Chill The Mixture
- Place the cheese mixture in the refrigerator for 15 minutes. This crucial step firms up the cheese, making it much easier to shape into balls later. If you skip this step, you'll end up with a sticky mess that's impossible to work with.
- Prepare Seasoned Flour
- In a shallow bowl, combine the all-purpose flour with garlic powder, onion powder, paprika, salt, and pepper. Mix thoroughly to ensure even distribution of seasonings. This flavored flour will be your first coating layer and adds flavor directly to the cheese.
- Prepare Egg Wash
- Beat the eggs in a separate bowl until fully combined with no visible whites. The egg wash acts as the glue that helps the breadcrumbs adhere to the flour-coated cheese balls. Make sure your bowl is wide enough for easy dipping.
- Set Up Breadcrumb Station
- Place breadcrumbs in a third bowl, ensuring you have enough depth for rolling the balls. Panko breadcrumbs create the crispiest exterior, but regular breadcrumbs work well too. Arrange your stations in order flour, egg, breadcrumbs for an efficient workflow.
- Form Cheese Balls
- Remove the chilled cheese mixture from the refrigerator and form into approximately 24 one-inch balls. Work quickly as the cheese will soften at room temperature. If the mixture becomes too soft, return it to the refrigerator for a few minutes before continuing.
- Apply First Coating
- Roll each cheese ball in the seasoned flour mixture until completely coated. Tap off any excess flour gently. This first coating creates a barrier that helps prevent cheese from leaking during frying.
- Egg Wash Application
- Dip each floured cheese ball into the beaten eggs, ensuring complete coverage. Allow excess egg to drip off. The egg wash needs to cover every bit of the flour to ensure the breadcrumbs will stick properly.
- Final Breadcrumb Coating
- Roll the egg-coated balls in breadcrumbs, pressing gently to ensure complete adhesion. For extra crispiness, you can double-coat by repeating the egg and breadcrumb steps. Place the coated balls on a plate and refrigerate for 10 minutes to set the coating.
- Heat Frying Oil
- In a deep skillet or pot, heat oil to 350°F. Use a thermometer for accuracy as the right temperature is crucial. Too low and the balls absorb excess oil, too high and they burn before the cheese melts. Maintain this temperature throughout frying.
- Fry In Batches
- Carefully add cheese balls to the hot oil in small batches, about 4-6 at a time. Fry for 2-3 minutes, turning occasionally until golden brown on all sides. Overcrowding the pan will lower the oil temperature and result in soggy cheese balls.
- Drain Excess Oil
- Remove fried cheese balls with a slotted spoon and place on paper towels to drain excess oil. Blot gently with additional paper towels if needed. This step ensures your cheese balls stay crispy rather than greasy.
- Serve Immediately
- Transfer to a serving plate and serve hot with your favorite dipping sauce. The magic of these cheese balls is in the molten center, which is best enjoyed immediately while the exterior is crisp and the interior is perfectly melted.

My absolute favorite way to enjoy these cheese balls is with a spicy marinara sauce that my grandmother taught me to make. The contrast between the creamy, melted cheese interior and the slightly spicy tomato sauce creates an unforgettable flavor combination that reminds me of Sunday family dinners growing up.
Make-Ahead Options
These cheese balls can be prepared up to the coating stage and refrigerated for up to 24 hours before frying. Simply place the coated, uncooked cheese balls on a baking sheet lined with parchment paper, cover loosely with plastic wrap, and refrigerate. This makes them perfect for entertaining, as you can do the messy prep work ahead of time and simply fry them when guests arrive. The cold temperature actually helps the coating adhere better during frying.
Creative Variations
While the classic cheddar and mozzarella combination is always a winner, experimenting with different cheese varieties can create exciting flavor profiles. Try pepper jack for a spicy kick, smoked gouda for a rich depth, or blue cheese for a tangy punch. You can also incorporate finely chopped herbs like chives, parsley, or basil into the cheese mixture. For an Italian twist, add a pinch of dried oregano and basil to both the cheese mixture and the breadcrumbs.
Baking Alternative
If you prefer to avoid frying, these cheese balls can be baked instead. Preheat your oven to 425°F, place the prepared cheese balls on a parchment-lined baking sheet, and spray or brush lightly with oil. Bake for 8-10 minutes until golden brown and just beginning to ooze. While the texture won't be identical to the fried version, they'll still be delicious and significantly lower in fat. For extra crispiness, place them under the broiler for the final minute of cooking.
Serving Suggestions
These versatile cheese balls pair beautifully with a variety of accompaniments. Create an impressive appetizer board by surrounding them with antipasto items like olives, marinated artichokes, and cured meats. For a fun interactive element at parties, set up a dipping station with various sauces such as classic marinara, ranch, honey mustard, and buffalo sauce. They also make a wonderful addition to a soup and salad meal, serving as the perfect crispy, protein-rich accompaniment.

Recipe FAQs
- → Can I bake these cheese balls instead of frying?
Yes, you can bake them at 375°F for 10-12 minutes on a parchment-lined baking sheet. Spray with cooking oil before baking for a crispier exterior. The texture won't be identical to fried, but they'll still be delicious with melted centers.
- → How do I prevent the cheese from leaking during cooking?
Make sure to chill the cheese mixture thoroughly before forming balls. Double-coat with breadcrumbs if needed, ensuring no thin spots in the coating. Also, maintain the proper oil temperature (350°F) - if too hot, the outside browns before the inside sets.
- → Can I make these cheese balls ahead of time?
You can prepare and bread the cheese balls up to 24 hours in advance and keep them refrigerated. For best results, fry them just before serving. Already-fried balls can be reheated in a 350°F oven for 5-7 minutes, though they're always best fresh.
- → What cheese combinations work best?
Cheddar and mozzarella create an ideal balance of flavor and meltability. Other excellent combinations include pepper jack and mozzarella for heat, or Gruyère and fontina for sophistication. Ensure at least one cheese has good melting properties for the desired gooey center.
- → What are good dipping sauces besides marinara and ranch?
Try honey mustard, spicy sriracha mayo, garlic aioli, sweet chili sauce, or buffalo sauce. For a gourmet touch, consider a balsamic glaze or pesto sauce. The creamy or tangy qualities of these sauces complement the rich, melted cheese.
- → How can I tell when the oil is at the right temperature without a thermometer?
Drop a small breadcrumb into the oil - it should sizzle and float to the top but not burn immediately. Alternatively, dip the end of a wooden spoon into the oil; if small bubbles form around it, the oil is ready. Proper temperature is crucial for evenly cooked cheese balls.