
 Save
Save
This hearty crispy ground beef taco recipe has been my family's go-to dinner solution for years. When the busy weeknight rush hits, these golden-brown, cheese-filled tacos never fail to bring smiles to the table while keeping prep time manageable.
I first made these tacos when I needed a quick dinner solution after a particularly exhausting day at work. The combination of that satisfying crunch and the warm, seasoned beef filling was such a hit that they've become our most requested Taco Tuesday feature.
Ingredients
- 1 pound lean ground beef 90% lean for best flavor without excess grease
- 1 packet taco seasoning about 2 tablespoons of balanced spices that perfectly complement the beef
- 3/4 cup red enchilada sauce adds moisture and depth to the meat filling
- 10 corn tortillas traditional option that crisps beautifully choose quality brands for best results
- 2 1/2 cups Oaxaca cheese creates the perfect stretchy melt look for freshly shredded for best flavor
- 1 tablespoon olive oil helps achieve golden crispy texture on the tortillas
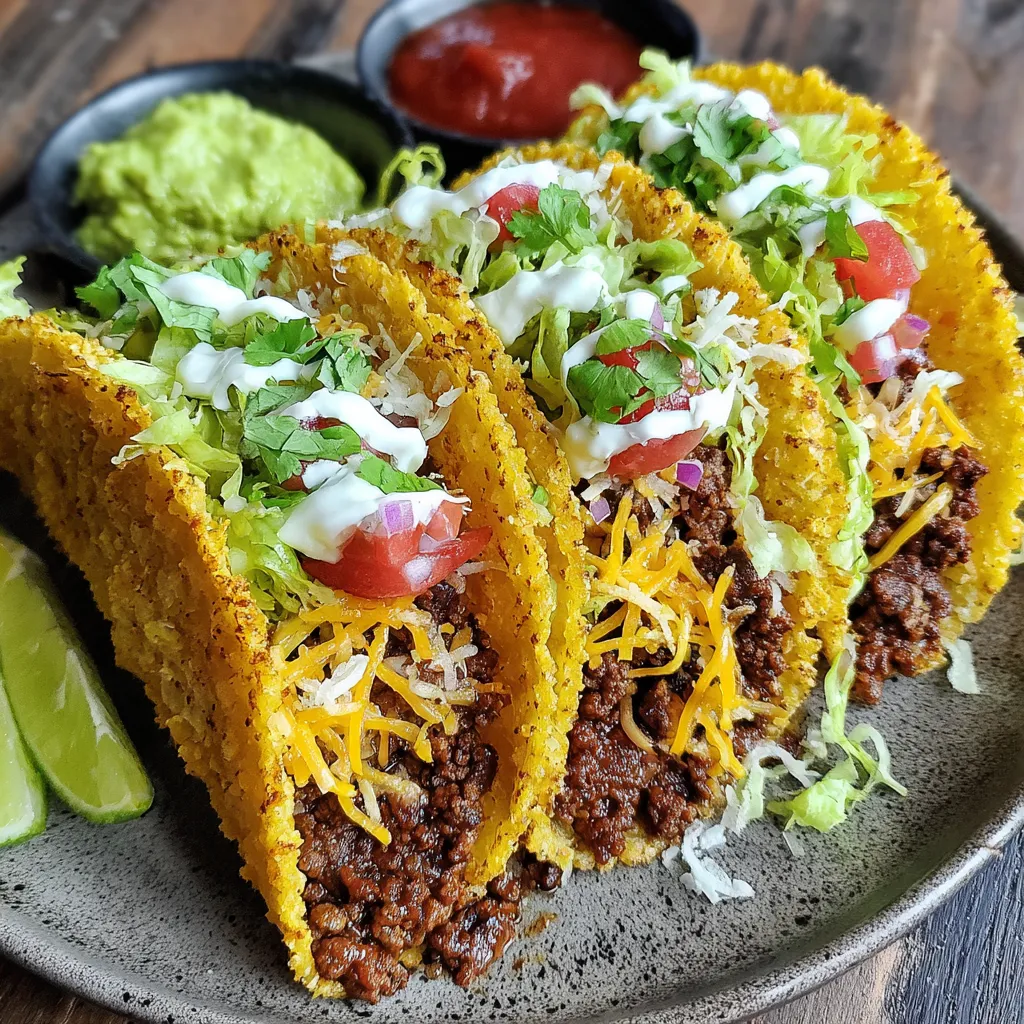
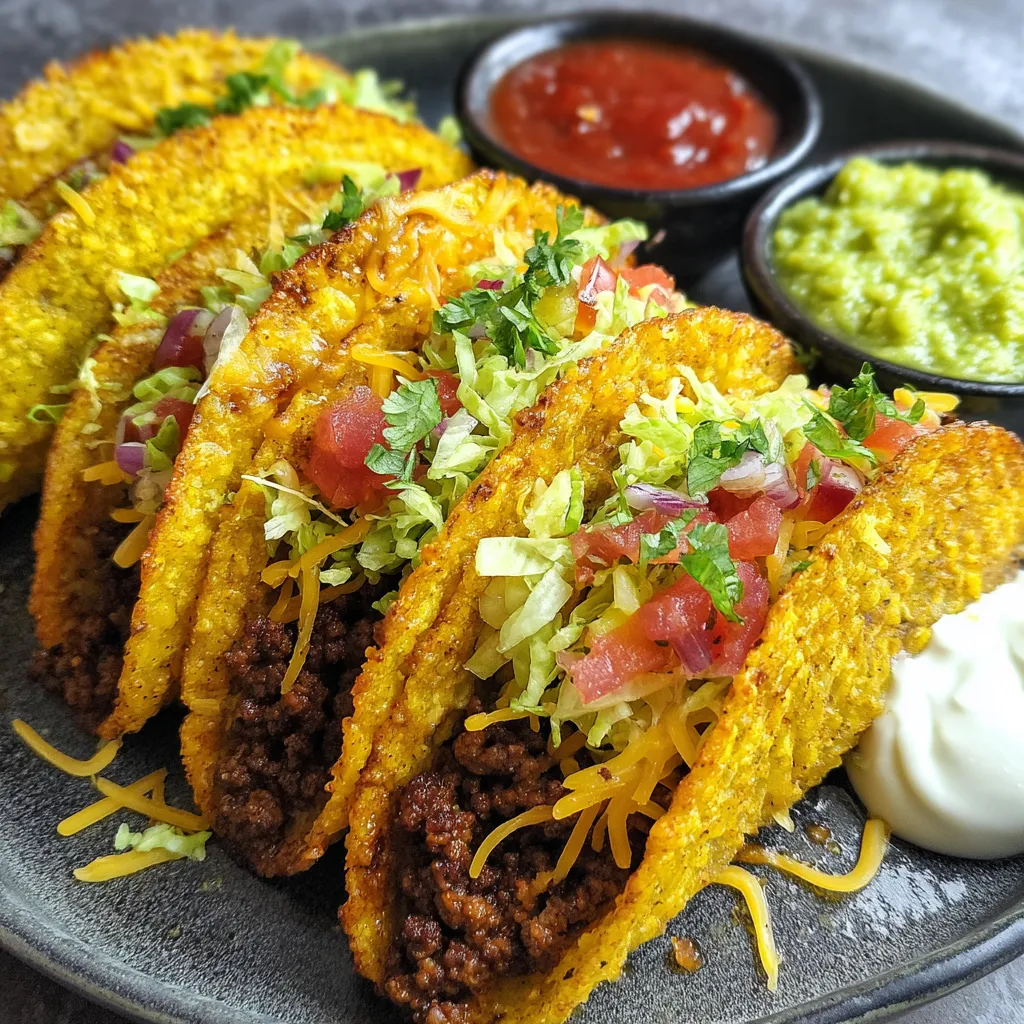
- Optional toppings salsa queso dip guacamole sour cream lettuce tomatoes and jalapeños all enhance the experience
Step-by-Step Instructions
- Preheat Oven
- Set your oven to 450°F and allow it to fully preheat. This high temperature is crucial for achieving that perfect crispy exterior while maintaining a melty cheese interior. Patience here pays off with superior texture.
- Brown the Beef
- Heat a large skillet over medium high heat until hot. Add ground beef and cook breaking it up continuously with a wooden spoon until fully browned with no pink remaining about 5 to 7 minutes. Watch carefully as it cooks avoiding both undercooking and burning for best flavor development.
- Season the Meat
- Once beef is properly browned sprinkle the taco seasoning evenly over the meat and stir thoroughly to coat every piece. Pour in the enchilada sauce and combine well allowing the mixture to simmer briefly before reducing heat to low. Let it cook for another 2 to 3 minutes so the flavors can properly meld together creating a rich cohesive filling.
- Prepare Tortillas
- Stack your corn tortillas and wrap them in a clean damp paper towel. Microwave for 30 to 60 seconds until warm and pliable. This critical step prevents cracking when folding. Keep tortillas wrapped while working with one at a time to maintain flexibility throughout the assembly process.
- Prepare Baking Surface
- Select a nonstick or ceramic baking sheet for best results avoiding aluminum foil which can cause sticking issues. If using a standard baking sheet apply a light coating of cooking spray to ensure easy removal after baking.
- Assemble Tacos
- Take one warmed tortilla and brush one side lightly with olive oil placing it oiled side down on the baking sheet. Add about 2 tablespoons of cheese on one half followed by 1/4 cup of the seasoned beef mixture. Top with another 2 tablespoons of cheese creating a sandwich effect that will seal the filling when melted.
- Fold and Arrange
- Carefully fold the empty half of each tortilla over the filling creating a half moon shape. Apply gentle pressure to help it stay closed. If any tortillas crack secure with toothpicks that will be removed before serving. Arrange assembled tacos on the baking sheet leaving small spaces between each for proper heat circulation.
- Bake to Perfection
- Place the baking sheet in your preheated oven and bake for exactly 16 minutes until the tortillas develop a beautiful golden brown color with crispy edges and the cheese inside melts completely. Monitor closely during the final minutes to prevent burning which can happen quickly at this high temperature.
- Cool Briefly
- Remove tacos from the oven and allow them to rest on the baking sheet for 3 minutes. This short cooling period allows the cheese to set slightly making the tacos easier to handle and preventing burnt mouths from overly hot filling.
- Serve and Enjoy
- Transfer your crispy tacos to a serving plate accompanied by small bowls of dipping options like salsa queso guacamole and sour cream. These tacos are best enjoyed immediately while the contrast between crispy shell and melty filling is at its peak.
My favorite part of making these tacos is watching my kids faces light up when they hear that first satisfying crunch. Something about the contrast between the crispy shell and the warm savory filling inside creates a sensory experience that brings pure joy to our dinner table every single time.
Make-Ahead Tips
You can prepare the beef filling up to two days in advance and store it in an airtight container in the refrigerator. When ready to make tacos simply reheat the filling in a skillet with a splash of water or broth to restore moisture before assembling and baking. This makes weeknight dinner prep even quicker while maintaining all the flavor.
Perfect Substitutions
If corn tortillas aren't your preference flour tortillas work beautifully in this recipe though they create a slightly different texture and flavor profile. For those avoiding dairy try dairy free cheese alternatives that melt well such as those made from cashews or tapioca starch. Plant based ground meat substitutes can replace beef with minimal recipe adjustments just be sure to add a bit more oil when cooking as they contain less natural fat.
Serving Suggestions
While these tacos are delicious on their own they shine as part of a complete Mexican inspired feast. Pair them with cilantro lime rice black beans and a simple side salad for a well rounded meal. For entertaining consider setting up a taco bar with the crispy tacos as the star and various toppings for guests to customize their plates. A pitcher of homemade horchata or margaritas completes the experience for adult gatherings.

Recipe FAQs
- → Can I make these tacos with corn tortillas if I'm gluten-sensitive?
Yes, these tacos are naturally gluten-free when made with corn tortillas as specified in the recipe. Just be sure to check your taco seasoning and enchilada sauce ingredients for hidden gluten if you have celiac disease or severe gluten sensitivity.
- → How can I prevent my corn tortillas from cracking when I fold them?
The key is properly warming the tortillas before folding. Wrap them in a damp paper towel and microwave for 30-60 seconds until they're soft and pliable. Work with one tortilla at a time, keeping the rest wrapped to stay warm and flexible. If a tortilla does crack, you can secure it with a toothpick while baking (just remember to remove it before serving).
- → What's the best cheese to use for these tacos?
Oaxaca cheese is traditional and melts beautifully, but any good melting cheese works well. Mexican cheese blend, Monterey Jack, or even a combination of cheddar and mozzarella will produce excellent results. The important thing is using cheese that melts well to help bind the tacos together.
- → Can I prepare these tacos ahead of time?
You can prepare the beef filling up to two days ahead and refrigerate it. When ready to serve, reheat the filling, then assemble and bake the tacos fresh. The assembled tacos can be prepared a few hours ahead and refrigerated unbaked, but they're best when baked right before serving for maximum crispiness.
- → What can I substitute for red enchilada sauce?
If you don't have red enchilada sauce, you can substitute 3/4 cup of salsa, taco sauce, or even a mixture of tomato sauce with a tablespoon of chili powder. In a pinch, you could use a few tablespoons of tomato paste mixed with water and seasoned with cumin, garlic powder, and oregano.
- → Can I make these tacos with a meat alternative?
Absolutely! This recipe works well with ground turkey, chicken, or plant-based meat substitutes. For vegetarian options, you could also use crumbled tofu, textured vegetable protein (TVP), or a bean mixture. Just adjust the cooking time accordingly as some alternatives may cook faster than beef.