
 Save
Save
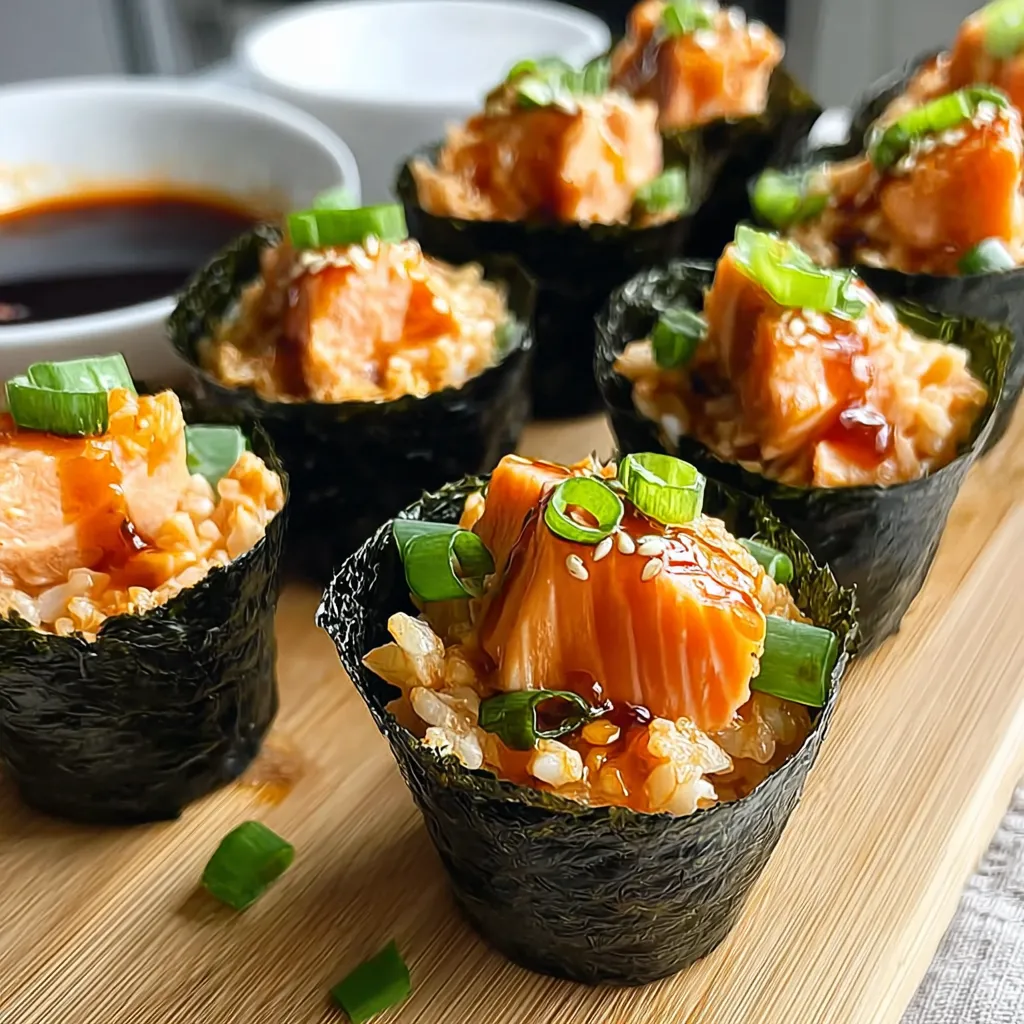
This spicy salmon sushi cups recipe transforms traditional sushi rolls into adorable, perfectly portioned bites that deliver all the flavors you love in an easy-to-eat format. I created these when hosting a dinner party where I wanted impressive appetizers without spending the entire evening in the kitchen rolling sushi.
I first made these during a Japanese-themed dinner party and they were the first appetizer to disappear. Now they've become my go-to when I want to impress guests without stressing in the kitchen all day.
Ingredients
- Sushi rice or sticky jasmine rice provides the perfect sticky base for these cups. Look for short-grain varieties for authentic texture.
- Fresh salmon is the star here. Always buy the highest quality you can find, preferably sushi-grade from a trusted fishmonger.
- Japanese mayonnaise has a richer, tangier flavor than regular mayo. Kewpie brand is ideal but any good quality mayo works.
- Sriracha adds customizable heat. Start with less if you're sensitive to spice.
- Nori sheets create the crisp outer shell. Choose packages that appear dry and crisp for best results.
- Rice vinegar gives the rice that signature sushi tang. Don't substitute with other vinegars for authentic flavor.
- Sesame oil provides nutty depth with just a few drops. Always use toasted variety for maximum flavor.
Step-by-Step Instructions
- Prepare the Rice
- Cook rice according to package directions until tender and sticky. The key is rinsing the rice thoroughly before cooking to remove excess starch. Once cooked, gently fold in rice vinegar while still warm to infuse flavor and create that signature sushi rice texture.
- Create the Salmon Mixture
- Cube fresh salmon into small pieces about 1/4 inch in size. In a bowl, combine with Japanese mayonnaise, sriracha, sesame oil, and soy sauce. The mixture should be well coated but not drowning in sauce. Allow flavors to meld for at least 5 minutes while you prepare the cups.
- Form the Nori Cups
- Cut nori sheets into quarters and place a small mound of prepared rice in the center of each. Gently press the rice-covered nori into muffin tin cups, creating a nest-like shape. The rice should cover the bottom and slightly up the sides but leave the nori edges exposed for a pretty presentation.
- Fill and Bake
- Spoon the salmon mixture into each nori cup, filling to just below the rim. Bake until the salmon is just cooked through and the nori edges become slightly crisp. Watch carefully during the final minutes to prevent overcooking the delicate salmon.
- Garnish and Serve
- Remove from the oven and transfer to a serving platter. Drizzle with spicy mayo, sprinkle with green onions and sesame seeds. The contrast of colors makes these cups as beautiful as they are delicious.

The first time I served these at a gathering, my Japanese friend's grandmother asked for the recipe. That moment of cultural exchange over food remains one of my favorite cooking memories, proving that respectful innovation can bridge culinary traditions.
Make-Ahead Options
These sushi cups work beautifully for meal prep. Prepare all components separately up to two days in advance. Store the cooked rice, salmon mixture, and spicy mayo in separate airtight containers in the refrigerator. When ready to serve, assemble and bake fresh for the best texture and flavor. The fully assembled cups can also be refrigerated for up to 4 hours before baking.
Salmon Selection Tips
The quality of salmon makes all the difference in this recipe. For raw preparation, seek out sushi-grade salmon from a reputable fishmonger or Japanese market. Look for bright, firm flesh with minimal fishy aroma. If sushi-grade isn't available, you can briefly cure the salmon by sprinkling with salt and sugar for 30 minutes, then rinsing well before proceeding with the recipe. This improves both safety and texture.
Serving Suggestions
These sushi cups work beautifully as part of a larger Japanese-inspired spread. Pair them with edamame, miso soup, and a simple cucumber salad for a complete meal. For entertaining, arrange them on a platter alongside traditional California rolls and vegetable tempura for an impressive DIY sushi bar. A chilled sake or Japanese beer complements the flavors perfectly.

Recipe FAQs
- → Can I use cooked salmon instead of raw?
Yes, you can substitute pre-cooked salmon if you prefer. Simply skip the baking step and warm the assembled cups in the oven for 2-3 minutes before serving. The texture will be different but still delicious.
- → How far in advance can I prepare these sushi cups?
The rice and spicy mayo can be prepared up to 24 hours ahead. However, for best quality, the salmon mixture should be prepared no more than 2 hours before assembly, and the final cups are best assembled and baked just before serving.
- → What can I substitute for sriracha?
You can use gochujang (Korean chili paste), chili garlic sauce, or even a combination of cayenne pepper and honey as alternatives to sriracha. Adjust quantities based on your heat preference.
- → Are these sushi cups gluten-free?
These cups are not gluten-free as written due to the soy sauce. To make them gluten-free, substitute tamari or certified gluten-free soy sauce, and ensure your mayonnaise is gluten-free.
- → Can I make these sushi cups vegetarian?
Absolutely! Replace the salmon with diced avocado, cucumber, and carrot for a vegetarian version. You can also use marinated tofu or tempeh as protein alternatives.
- → What's the best way to store leftovers?
Store leftovers in an airtight container in the refrigerator for up to 24 hours. The nori will soften, but the cups will still taste good. Reheat gently in a microwave for 20-30 seconds before serving.