
 Save
Save
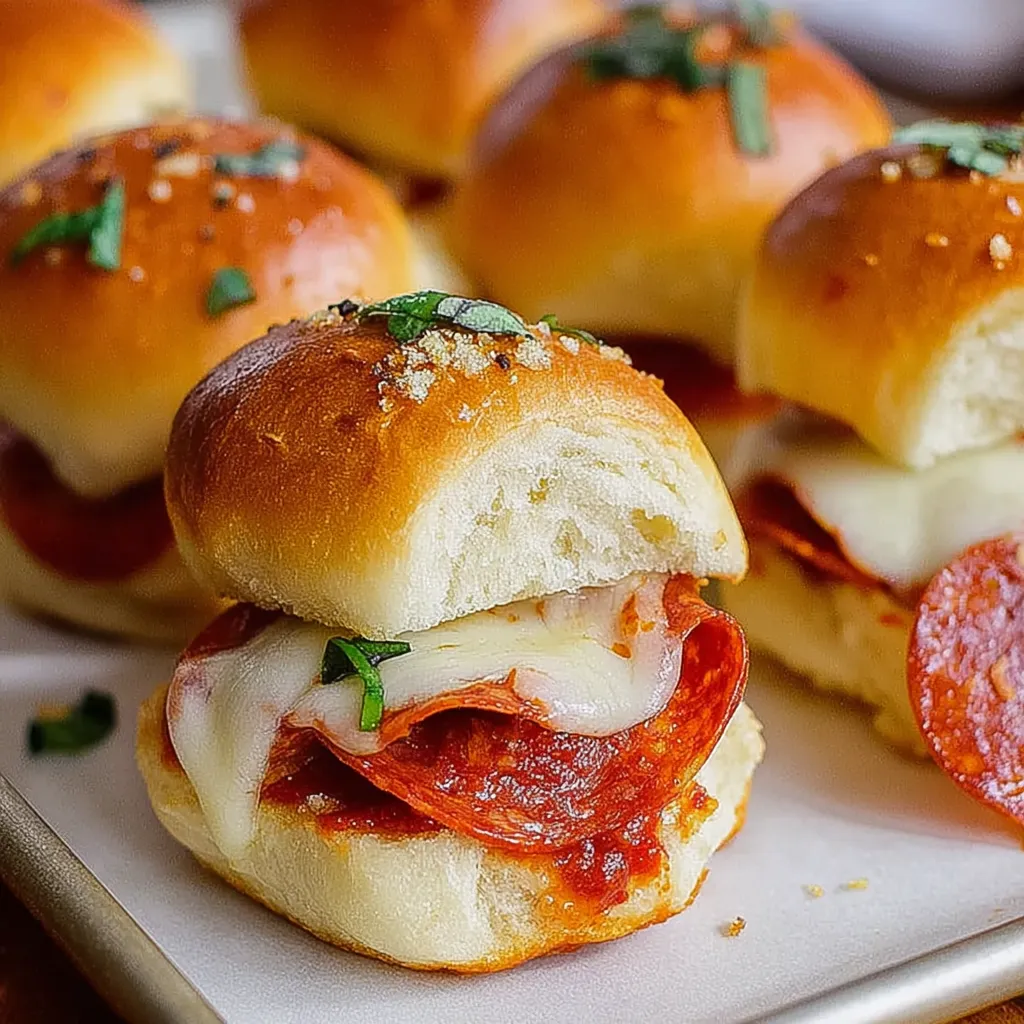
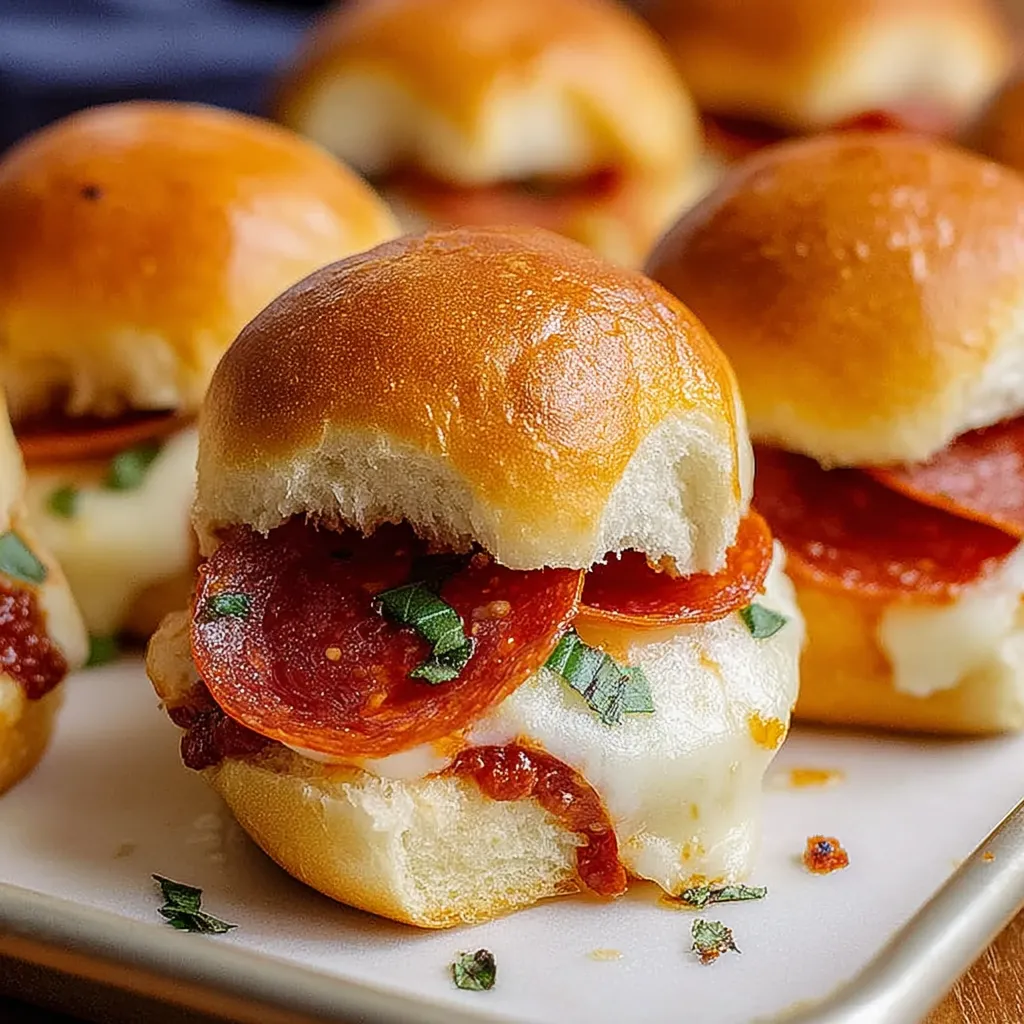
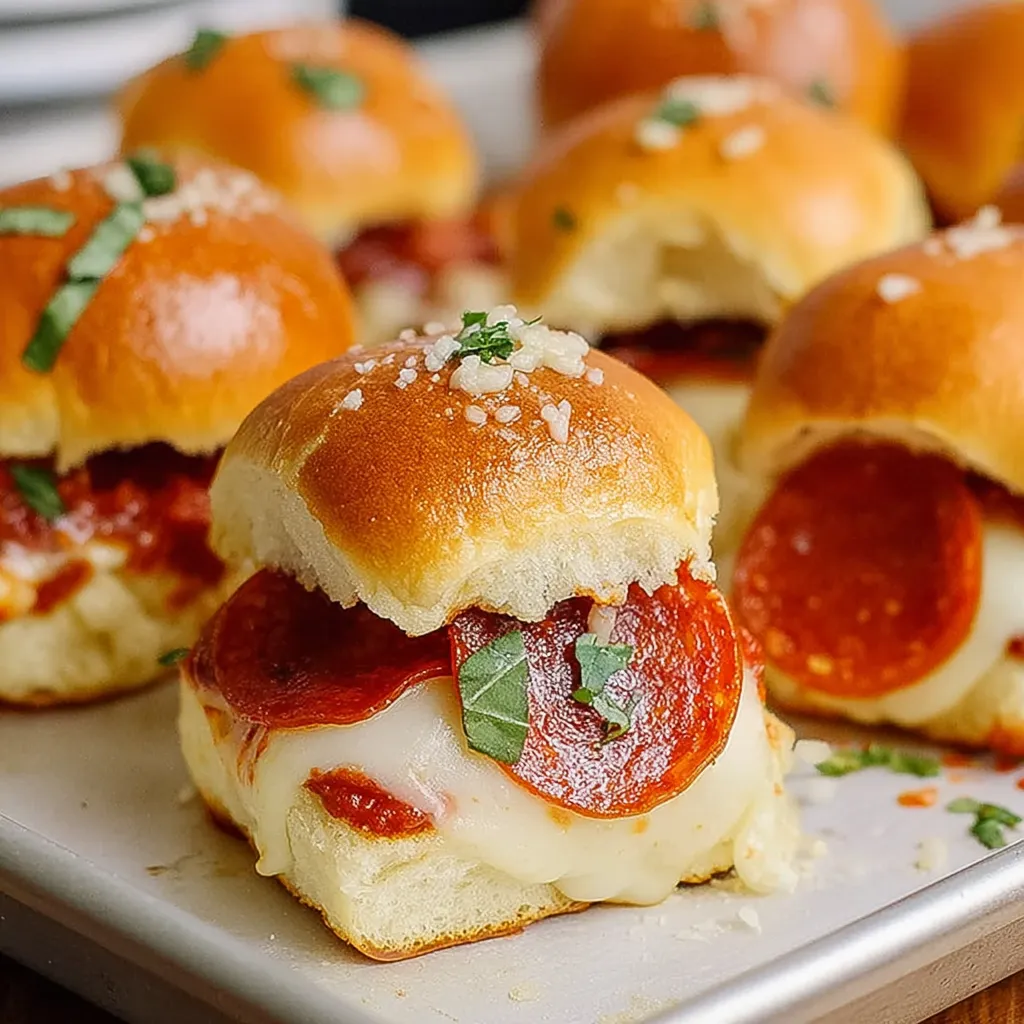
This pepperoni pizza slider recipe transforms ordinary dinner rolls into irresistible mini pizza sandwiches that disappear within minutes at every gathering I host. The combination of gooey cheese, zesty pepperoni, and that buttery garlic topping creates the perfect handheld comfort food without the fuss of making pizza dough.
I first made these sliders for my nephew's birthday party as a quick alternative to ordering pizza. They were such a hit that the adults devoured them faster than the children, and now they've become our go-to solution for last-minute gatherings.
Ingredients
- Hawaiian slider buns These sweet rolls create the perfect contrast to the savory fillings and develop a beautiful caramelized exterior when baked.
- Marinara sauce Use your favorite jarred sauce for convenience or homemade for extra flavor. The thickness matters choose a thicker sauce to prevent soggy buns.
- Mozzarella cheese Freshly shredded melts more evenly than pre-packaged. A low-moisture variety works best to keep the sliders from getting soggy.
- Pepperoni slices Mini pepperonis distribute more evenly but regular slices work well too. Look for a good quality pepperoni with visible spices for the best flavor.
- Unsalted butter Forms the base of our flavorful topping. Using unsalted lets you control the salt level.
- Garlic powder Infuses the butter topping with aromatic flavor. Fresh minced garlic can burn, so powder works perfectly here.
- Dried oregano Adds classic Italian flavor to the butter topping. Make sure yours is fresh and aromatic.
- Red pepper flakes Optional but adds a pleasant warmth. Adjust according to your heat preference.
- Parmesan cheese Use freshly grated for the best flavor and texture on top.
- Fresh basil Adds brightness and color as a finishing touch. Try to use fresh rather than dried for this garnish.
Step-by-Step Instructions
- Prepare the Oven and Baking Dish
- Preheat your oven to a moderate 350°F which allows the cheese to melt slowly without burning the tops. Take a moment to lightly grease your baking dish this prevents sticking and makes cleanup easier. A 9x13 dish works perfectly for standard packages of slider buns.
- Prepare the Slider Buns
- Keep the slider buns connected and slice them horizontally as one unit using a serrated knife. This technique keeps everything neat and makes assembly much faster. Place the bottom half in your prepared dish, making sure it fits snugly.
- Layer the Fillings
- Spread marinara sauce in an even thin layer across the bottom buns, reaching all the way to the edges. The first layer of cheese acts as a barrier to prevent the sauce from making the bread soggy. Arrange the pepperoni in a single layer for even coverage, then add the remaining cheese to seal everything together.
- Create the Flavor Topping
- Combine melted butter with the garlic powder, oregano, and red pepper flakes in a small bowl, whisking until well incorporated. This aromatic mixture will seep into the buns while baking, infusing them with incredible flavor. Use a pastry brush to generously coat the top of the buns, making sure to get into all the crevices.
- Bake to Perfection
- Cover the dish with foil for the first portion of baking this traps steam and helps melt the cheese completely. When you remove the foil for the final minutes of baking, the tops will develop that beautiful golden color and slight crispness that makes these sliders irresistible.
- Finish and Serve
- Sprinkle with Parmesan and fresh basil right after removing from the oven so they slightly melt into the warm tops. Let the sliders rest for about 5 minutes before cutting this allows the cheese to set slightly so it doesn't all ooze out with the first cut. Serve with extra warm marinara for dipping.
The garlic butter topping is what truly elevates these sliders from good to outstanding. My grandmother taught me this technique years ago for her famous garlic bread, and adapting it for these sliders was a game-changer. The butter seeps into the bread as it bakes, creating this incredible flavor infusion that makes everyone ask for the recipe.
Make-Ahead Instructions
These pepperoni pizza sliders are perfect for planning ahead. You can assemble everything up to a day before your event, cover tightly with plastic wrap, and refrigerate. Just remove from the refrigerator about 30 minutes before baking to take the chill off, and you may need to add 5 extra minutes to the covered baking time. This make-ahead option has saved me countless times when hosting game day gatherings where I want to enjoy the party rather than be stuck in the kitchen.
Customization Ideas
Think of this recipe as your pizza slider canvas! My family loves creating different variations based on our favorite pizza toppings. Try adding thinly sliced bell peppers and onions sautéed briefly to remove excess moisture. For a supreme version, include Canadian bacon, olives, and mushrooms just make sure any vegetables are pre-cooked to prevent water release during baking. Vegetarian guests appreciate a version with roasted vegetables and extra cheese. My personal favorite variation includes a layer of ricotta cheese mixed with Italian herbs spread underneath the marinara.
Serving Suggestions
These sliders work beautifully as both an appetizer or main course. For game day spreads, I place them alongside other finger foods like buffalo wings and veggie platters. When serving as a main dish, I pair them with a simple green salad dressed with Italian vinaigrette to cut through the richness. A batch of these sliders plus a pot of minestrone soup makes for a comforting weekend lunch that my family requests constantly during colder months. Individual ramekins of warm marinara sauce for dipping take these sliders to the next level of deliciousness.
Storage and Reheating
Leftover sliders will keep in an airtight container in the refrigerator for up to 3 days. For best results when reheating, wrap individual sliders loosely in foil and warm in a 325°F oven for about 10 minutes, or until heated through. The microwave works in a pinch about 20-30 seconds per slider but the bread will soften rather than stay crisp. These sliders also freeze exceptionally well. Wrap individual portions in plastic wrap then foil, and freeze for up to 3 months. Thaw overnight in the refrigerator before reheating for best results.
Recipe FAQs
- → Can I make these sliders ahead of time?
Yes! You can assemble the sliders up to 24 hours in advance and refrigerate them covered. When ready to serve, add the butter topping and bake as directed, adding 5 extra minutes to the baking time if cooking straight from the refrigerator.
- → What can I substitute for Hawaiian rolls?
While Hawaiian rolls provide a delicious sweet-savory contrast, any slider buns or dinner rolls will work. Regular white dinner rolls, brioche buns, or whole wheat rolls are all suitable alternatives depending on your preference.
- → How do I keep the bottoms from getting soggy?
To prevent soggy bottoms, try lightly toasting the bottom half of the buns for 3-5 minutes before adding toppings. Additionally, you can spread a thin layer of butter on the inside of the bottom buns to create a moisture barrier before adding the marinara sauce.
- → Can I add other pizza toppings to these sliders?
Absolutely! These sliders are very versatile. Consider adding thinly sliced bell peppers, mushrooms, olives, or Italian sausage. Just make sure any raw vegetables or meats are pre-cooked and any additional ingredients are thinly sliced so they heat through properly.
- → What's the best way to reheat leftover sliders?
For best results, reheat leftover sliders in an oven or toaster oven at 325°F for about 10 minutes, covered with foil. This helps maintain their texture better than microwave reheating, which can make the buns soggy. Remove the foil for the last 2-3 minutes to re-crisp the tops.
- → Are these suitable for freezing?
Yes, these sliders freeze well. Bake them completely, allow to cool, then wrap individual portions in foil and freeze in a ziplock bag for up to 3 months. Thaw in the refrigerator overnight and reheat in a 325°F oven for 15-20 minutes or until heated through.