
 Save
Save
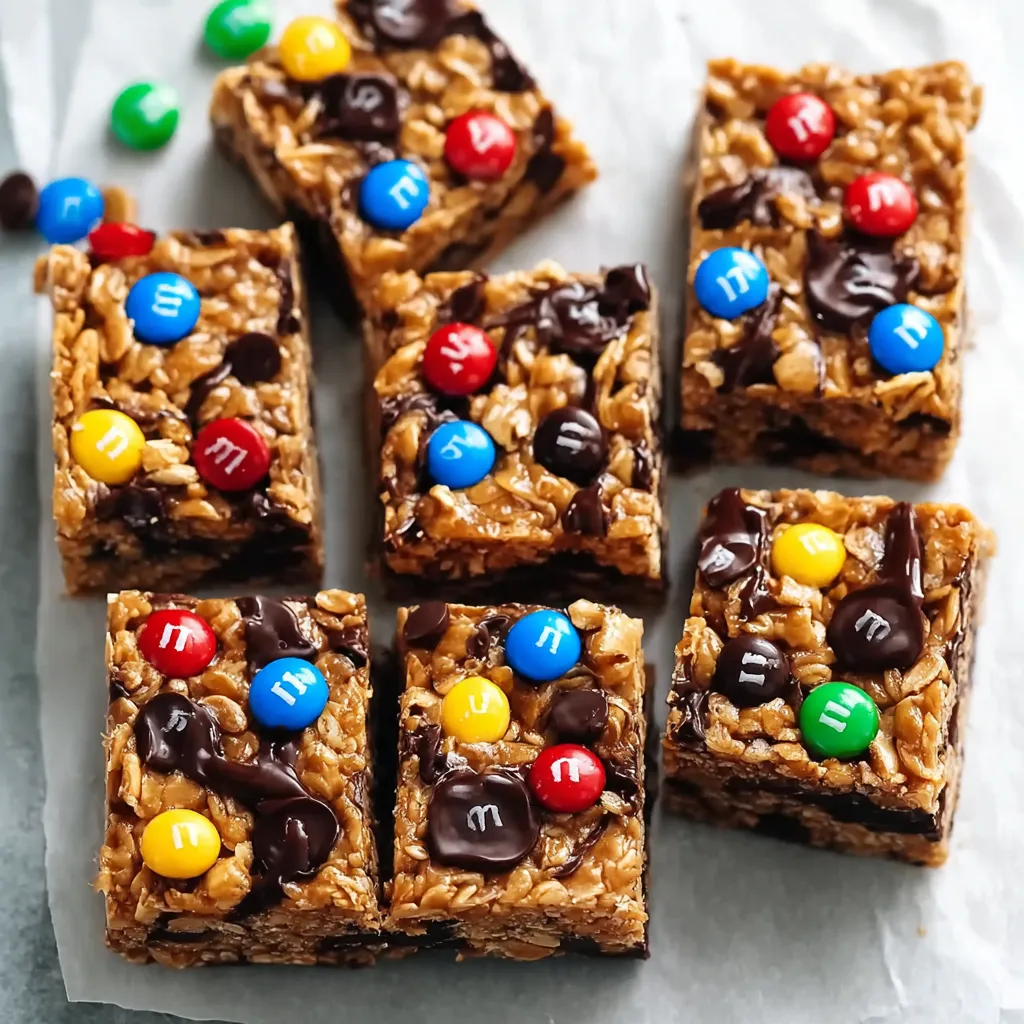
These chewy no-bake granola bars have become my go-to solution for busy mornings and afternoon snack cravings. Packed with nutritious oats, crunchy cashews, and just enough sweetness from honey and chocolate, they're the perfect portable energy boost that both kids and adults love.
I first created these bars during a particularly hectic week when I needed grab-and-go breakfast options. What started as a kitchen experiment quickly became a family favorite, with my children requesting them for lunchboxes and post-sports snacks.
Ingredients
- Creamy peanut butter forms the binding base while adding protein and richness
- Honey provides natural sweetness and helps the bars stick together
- Coconut oil enhances flavor and helps with texture when chilled
- Vanilla extract adds depth and warmth to the flavor profile
- Old fashioned oats create the hearty foundation and provide fiber
- Shredded coconut contributes pleasant texture and subtle tropical notes
- Roasted cashews add satisfying crunch and healthy fats
- Mini chocolate chips melt slightly when added to create pockets of chocolate throughout
- Mini M&Ms bring color and fun while maintaining their shape and crunch
Step-by-Step Instructions
- Prepare the Pan
- Line your baking pan with parchment paper leaving extra hanging over the sides. This creates handles that make removing the finished bars incredibly easy. Make sure to press the parchment into the corners for clean edges.
- Create the Binding Mixture
- Combine peanut butter, honey and coconut oil in a medium pot over medium heat. Stir constantly until completely melted and smooth. Allow the mixture to simmer for exactly one minute to help the ingredients bind properly. Remove from heat and let cool for 3 minutes before stirring in salt and vanilla. This cooling period prevents the chocolate from melting too quickly later.
- Prepare the Dry Ingredients
- Coarsely chop the cashews into pieces that will distribute evenly throughout the bars without being too small. Mix the chopped cashews with oats and coconut in a large bowl. This creates the nutritious foundation for your bars with varied textures.
- Combine Wet and Dry Ingredients
- Pour the peanut butter mixture over the dry ingredients and stir thoroughly until everything is well coated. Allow this mixture to cool for 15-25 minutes until just warm to the touch. Once cooled to the right temperature, gently fold in 1/4 cup each of chocolate chips and M&Ms. The mixture should be cool enough that the chocolate doesn't completely melt.
- Form the Bars
- Transfer the mixture to your prepared pan and press down VERY firmly using the flat bottom of a measuring cup. Apply significant pressure throughout the entire pan, especially in the corners. Sprinkle the remaining chocolate chips and M&Ms on top and gently press them into the surface for a colorful appearance.
- Set and Slice
- Refrigerate the bars for at least one hour until completely firm. Use the parchment paper handles to lift the entire slab out of the pan. With a sharp knife, cut into 12 equal bars. For cleanest cuts, wipe the knife between slices.

The mini chocolate chips are my secret weapon in this recipe. I discovered that using the mini size rather than regular chips creates the perfect chocolate distribution throughout each bite without overwhelming the other flavors. My children now help make these bars every Sunday afternoon, and watching them carefully arrange the M&Ms on top has become our special weekend tradition.
Storage Tips
These granola bars will keep fresh in an airtight container in the refrigerator for up to one week. I recommend placing parchment paper between layers to prevent sticking. For longer storage, these bars freeze beautifully for up to 6 months. Wrap each bar individually in parchment paper and store in a freezer-safe container. Allow frozen bars to thaw for about 20 minutes at room temperature before enjoying.
Customization Ideas
The beauty of this recipe lies in its flexibility. Feel free to swap the cashews for any nuts you prefer—almonds, pecans, or walnuts work wonderfully. Not a fan of peanut butter? Almond butter or sunbutter make excellent substitutions for those with allergies. The mix-ins can be customized to your taste—try dried cranberries, chopped dried apricots, or white chocolate chips for different flavor combinations. You can even add a tablespoon of chia seeds or ground flaxseed for additional nutrition.
Troubleshooting Guide
If your bars seem too crumbly, the mixture may have been too dry or not pressed firmly enough. Add an extra tablespoon of peanut butter or honey next time. If the bars are too sticky, try adding a few more tablespoons of oats to absorb the excess moisture. The perfect consistency should be firm enough to hold its shape when cut but still pleasantly chewy when bitten into. The temperature matters too—if your kitchen is very warm, the bars will set better if stored in the refrigerator.
Recipe FAQs
- → How do I ensure my granola bars hold together properly?
The key to bars that don't crumble is pressing the mixture VERY firmly into your pan. Use the flat bottom of a measuring cup to apply even, strong pressure across the entire surface. Also, be sure to let the mixture cool for the full 15-25 minutes before adding chocolate chips - if it's too warm, they'll melt completely instead of holding their shape.
- → Can I substitute different nuts or add-ins?
Absolutely! While this version uses cashews, you can substitute equal amounts of almonds, peanuts, walnuts, or pecans. For mix-ins, try dried cranberries, raisins, chopped dried apricots, or different types of chocolate chips. Just maintain the same total quantity to keep the wet-to-dry ingredient ratio balanced.
- → Are these bars actually gluten-free?
These bars can be gluten-free if you use certified gluten-free oats. Regular oats may have cross-contamination from processing facilities. Also check your chocolate chips and M&M's, as some brands may contain gluten or be processed in facilities with wheat products.
- → How should I store these granola bars?
Store cut bars in an airtight container in the refrigerator for up to 1 week. For longer storage, wrap individual bars in parchment paper, place in a freezer-safe container, and freeze for up to 6 months. Thaw frozen bars in the refrigerator overnight or at room temperature for about 30 minutes.
- → Can I make these bars without peanut butter?
Yes, you can substitute other nut butters like almond butter, cashew butter, or sunflower seed butter (for nut-free option) in equal amounts. Each will contribute a slightly different flavor profile. Just be aware that natural nut butters with oil separation may require additional mixing to incorporate properly.
- → Why do you need to simmer the wet ingredients?
Simmering the peanut butter, honey and coconut oil for one minute helps integrate these ingredients fully and slightly caramelizes the honey, enhancing flavor. This brief cooking also helps the mixture better bind the dry ingredients together, resulting in bars that hold their shape rather than crumbling apart.