
 Save
Save
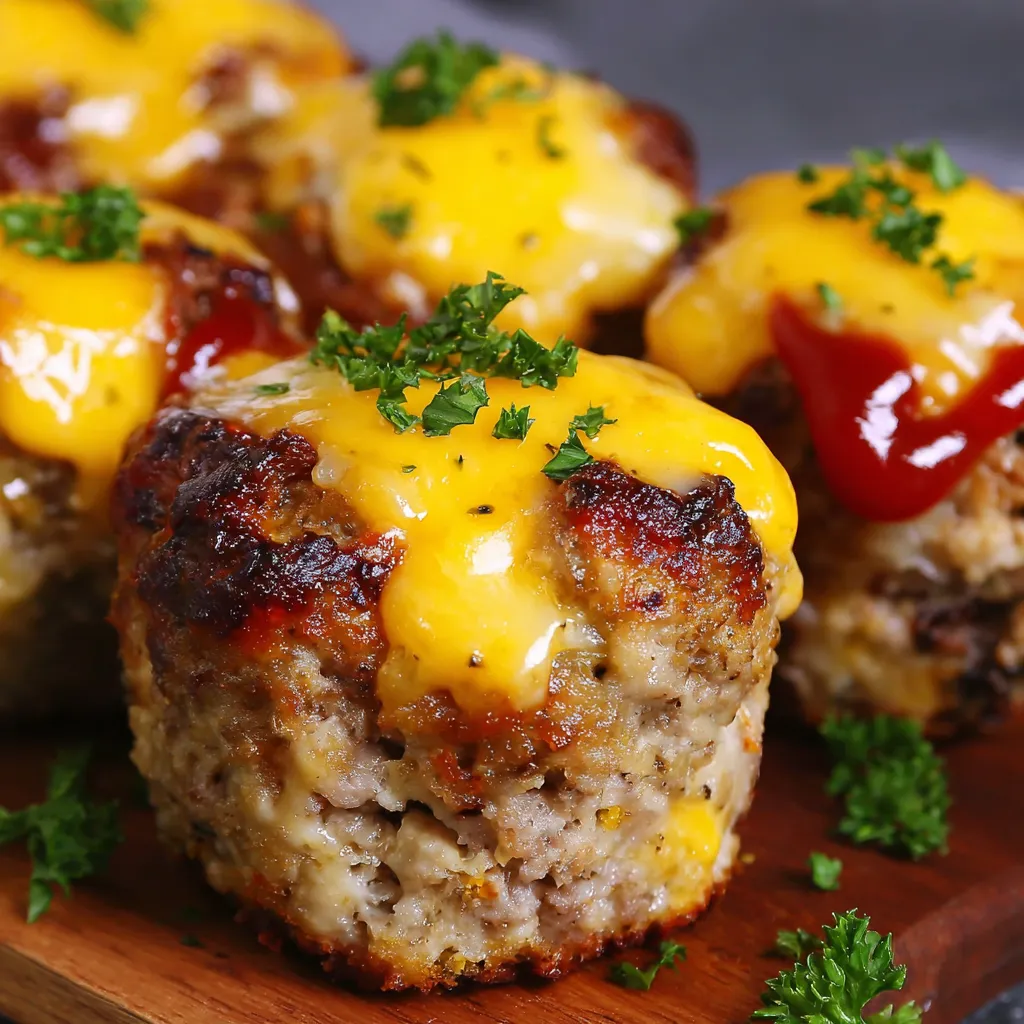
These bite-sized cheesy meatloaf morsels have become my go-to solution for weeknight dinners when I want comfort food without the long baking time of traditional meatloaf. The individual portions cook quickly and that moment when someone bites into one and discovers the melty cheese center makes all the prep worthwhile.
I first made these for my nephew who refused to eat regular meatloaf. The cheese surprise inside completely won him over, and now these little bites are requested at every family gathering.
Ingredients
- Ground beef provides the perfect base. Look for 80/20 lean to fat ratio for the juiciest results
- Breadcrumbs help bind everything together while keeping the texture light
- Milk activates the breadcrumbs and adds moisture to prevent dryness
- Egg acts as the crucial binder that holds everything together
- Onion and garlic create the aromatic foundation. Take time to mince them finely
- Worcestershire sauce adds that umami depth that makes people ask what your secret is
- Ketchup brings sweetness and tanginess to both the meat mixture and glaze
- Cheese cubes are the star. Choose a good melting cheese like cheddar or mozzarella that creates those irresistible cheese pulls
Step-by-Step Instructions
- Prepare Your Workspace
- Preheat your oven to exactly 375°F and generously grease each cup of your mini muffin tin. This temperature creates the perfect balance of browning the outside while cooking the inside thoroughly without drying out the meat.
- Mix The Meatloaf Base
- In a large bowl combine ground beef, breadcrumbs, milk, egg, onion, garlic, salt, pepper, Worcestershire sauce, 1/4 cup ketchup, and mustard. Use your hands to mix but avoid overworking the meat which can make it tough. Stop mixing as soon as ingredients are evenly distributed.
- Create The Stuffed Balls
- Take about 2 tablespoons of the meat mixture and flatten it in your palm creating a small disc. Place a cheese cube directly in the center then fold the meat around it completely sealing the cheese inside. Roll between your palms to form a perfect ball then place into a muffin cup.
- Add The Glaze
- Mix the remaining 1/4 cup ketchup with a bit of mustard in a small bowl until smooth. Spoon about a teaspoon of this mixture onto the top of each meatloaf bite. This creates a tangy sweet crust as it bakes.
- Bake To Perfection
- Place the filled muffin tin in the preheated oven and bake for 18 to 22 minutes. The tops should be slightly caramelized and the internal temperature should register 160°F on a meat thermometer when inserted into the center.
- Rest And Serve
- Allow the meatloaf bites to rest in the tin for 5 minutes which helps them set up and makes removal easier. Garnish with freshly chopped parsley if desired and serve while still warm for maximum cheese pull effect.

The first time I served these at a family dinner, my mother in law who guards her meatloaf recipe like a state secret actually asked me for mine. The secret is balancing the sweet tangy glaze with the savory meat and surprising cheese center.
Make Ahead Options
These meatloaf bites can be prepared up to the baking stage and refrigerated for up to 24 hours before cooking. Simply cover the muffin tin tightly with plastic wrap and store in the refrigerator. When ready to bake, remove from the refrigerator about 30 minutes before baking to take the chill off, then proceed with the recipe as written. This makes them perfect for entertaining when you want to prep ahead.
Smart Substitutions
The beauty of this recipe lies in its adaptability. Ground turkey can replace beef for a lighter option but add 1 tablespoon of olive oil to maintain moisture. For gluten free versions, use crushed rice crackers or certified gluten free oats instead of breadcrumbs. Plant based eaters can use Beyond Meat and vegan cheese alternatives with surprisingly good results. I discovered this when accommodating a vegetarian friend and was amazed at how well it worked.
Serving Suggestions
These versatile bites pair beautifully with so many sides. Serve alongside a crisp green salad for a light meal or with mashed potatoes and green beans for a more traditional dinner. They make excellent appetizers when served with toothpicks and a small dish of extra ketchup sauce for dipping. My family loves them tucked into slider buns with extra cheese for mini meatloaf sandwiches that disappear in minutes.
Recipe FAQs
- → Can I make these cheesy meatloaf bites ahead of time?
Yes, you can prepare the meatloaf mixture and form the bites up to 24 hours in advance. Store them covered in the refrigerator until ready to bake. You can also fully cook them, refrigerate for up to 3 days, and reheat in the microwave or oven until warmed through.
- → What cheese works best for the filling?
Cheddar and mozzarella are recommended for their excellent melting properties. Cheddar provides a sharper flavor while mozzarella offers that classic stretchy texture. Other good options include Colby Jack, pepper jack for a spicy kick, or even small cubes of cream cheese for a creamy center.
- → Can I freeze these cheesy meatloaf bites?
Absolutely! After baking and cooling completely, place the bites on a baking sheet in the freezer until solid, then transfer to a freezer bag or container. They'll keep for up to 3 months. Reheat from frozen in a 350°F oven for about 15-20 minutes or until heated through.
- → What can I serve with these meatloaf bites?
These versatile bites pair well with mashed potatoes, roasted vegetables, or a simple green salad for a complete meal. As an appetizer, serve with dipping sauces like BBQ sauce, ranch dressing, or additional ketchup. They're also great alongside pasta dishes or on slider buns for mini sandwiches.
- → Can I use ground turkey instead of beef?
Yes, ground turkey is a great substitute for a leaner option. Since turkey has less fat than beef, you might want to add 1-2 tablespoons of olive oil to the mixture to maintain moisture. Ground chicken or a blend of beef and pork would also work well in this recipe.
- → How do I prevent the cheese from leaking out during baking?
Make sure the cheese cube is completely enclosed by the meat mixture with no gaps or thin spots. When forming each bite, flatten the meat in your palm, place the cheese in the center, then completely wrap and seal the meat around it. Also, using cheese cubes rather than shredded cheese helps prevent leakage.