
 Save
Save
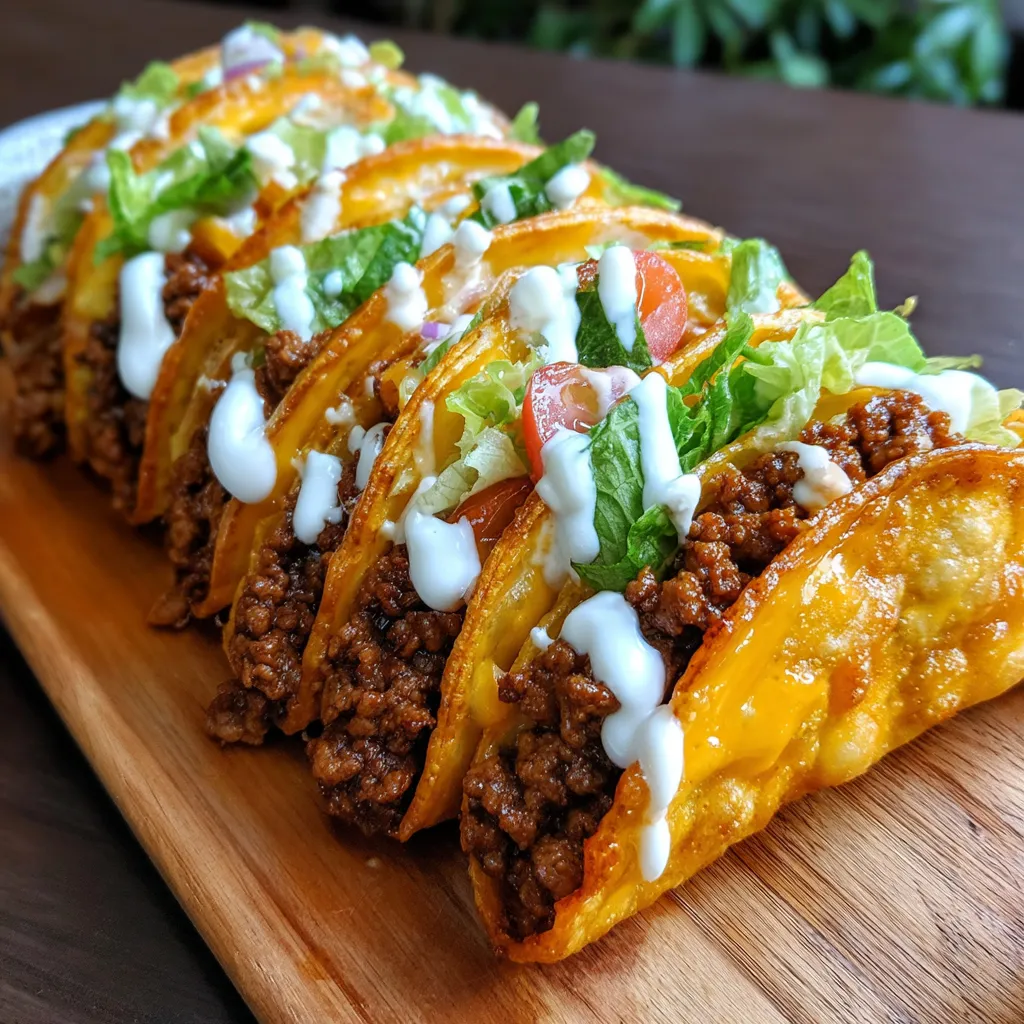
This hearty Loaded Cheesy Pocket Tacos recipe transforms traditional tacos into golden-baked pockets filled with seasoned beef and creamy cheese. They're perfect for family dinners, game day snacks, or make-ahead meals that everyone will love.
I created these pocket tacos when my family was getting bored with our usual taco night routine. The first time I served them, there was complete silence at the dinner table because everyone was too busy enjoying them to talk!
Ingredients
- Ground beef 80/20 recommended for the perfect balance of flavor and juiciness without becoming too greasy
- Taco seasoning packet provides consistent flavor every time you make this recipe
- Cream cheese creates a rich creamy base that holds everything together beautifully
- Salsa adds moisture and tanginess while letting you control the heat level
- Flour tortillas 6-inch size works perfectly for these handheld pockets
- Cheddar cheese choose a good quality medium or sharp variety for the best flavor
- Butter helps achieve that irresistible golden brown exterior
Step-by-Step Instructions
- Prepare the oven
- Preheat your oven to 350°F and prepare a baking sheet with cooking spray or parchment paper. This temperature allows the pockets to crisp up perfectly without burning.
- Brown the beef
- Cook ground beef in a skillet over medium-high heat until no pink remains, breaking it into small crumbles as it cooks. Drain most but not all of the fat to keep the filling moist and flavorful.
- Season the meat
- Add taco seasoning and water according to packet directions, then simmer until most liquid evaporates. The meat should be moist but not soupy for the perfect filling consistency.
- Prepare cream cheese mixture
- Beat softened cream cheese until smooth, then mix in salsa until fully combined. This creamy mixture is the secret ingredient that takes these pocket tacos to the next level.
- Warm the tortillas
- Briefly warm tortillas to make them pliable for folding. Cold tortillas will crack when you try to fold them, so don't skip this quick step.
- Assemble the pockets
- Spread cream cheese mixture down the center of each tortilla, add seasoned beef, and sprinkle with cheese. This layering ensures every bite has the perfect combination of flavors.
- Fold into pockets
- Fold bottom edge up over filling, then fold in both sides and roll upward to create a sealed pocket. Place seam-side down on the baking sheet to prevent them from opening during baking.
- Brush with butter
- Lightly brush the tops and sides with melted butter. This simple step ensures a beautifully golden, slightly crisp exterior that makes these irresistible.
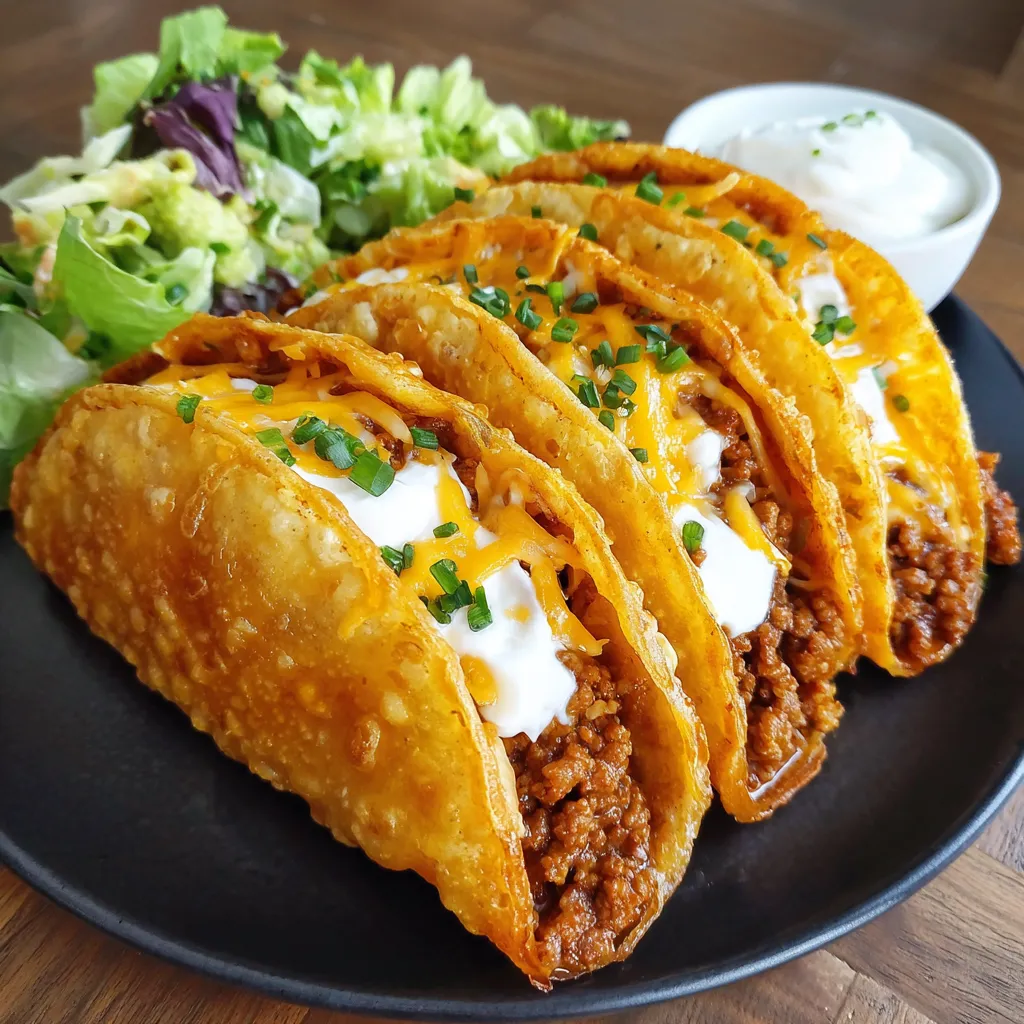
- Bake to perfection
- Bake for 15-18 minutes until golden brown and crispy. The heat transforms the ordinary tortilla into a crispy pocket while melting the cheese inside.
- Rest briefly and serve
- Let cool for just 2-3 minutes before serving with your favorite toppings. The brief rest allows the molten filling to set slightly so it doesn't burn mouths.
The cream cheese and salsa mixture is truly what makes these special. I discovered this combination by accident when I was short on sour cream one night, and now I wouldn't make them any other way. The way it creates a creamy base that holds all the flavors together is simply magical.
Make-Ahead Magic
These pocket tacos are perfect for busy weeknights. You can prepare the beef filling up to three days ahead and store it in the refrigerator. When ready to use, simply reheat it slightly before assembling your pockets. The cream cheese mixture can also be made a day ahead and stored separately. With these components ready, assembly takes just minutes before baking.
Freezer-Friendly Storage
For longer storage, these pocket tacos freeze beautifully before baking. Assemble them completely, then freeze in a single layer on a baking sheet until solid. Transfer to freezer bags or containers and store for up to three months. When ready to enjoy, bake directly from frozen, adding about 10 minutes to the baking time. This makes them perfect for meal prep or unexpected guests.
Creative Variations
The basic pocket taco formula works with countless filling variations. Try shredded chicken mixed with a bit of buffalo sauce and blue cheese. Vegetarian versions with black beans, corn, and peppers are delicious too. For breakfast pockets, use scrambled eggs, chorizo, and pepper jack cheese. The possibilities are endless, making this recipe a versatile template for countless meals.
Serving Suggestions
Create a DIY pocket taco bar by serving them with small bowls of sour cream, extra salsa, guacamole, shredded lettuce, and diced tomatoes for dipping. They pair perfectly with a simple side salad or Mexican rice. For parties, cut each pocket in half diagonally before serving as an appetizer. The portable nature of these pockets makes them ideal for casual entertaining where guests can eat while mingling.
Recipe FAQs
- → Can I make these pocket tacos ahead of time?
Yes! You can prepare the beef filling up to 2 days ahead and refrigerate it. For even more convenience, you can fully assemble the pocket tacos, freeze them in a single layer, then transfer to a freezer bag for up to 3 months. When ready to eat, bake from frozen, adding about 10 minutes to the regular cooking time.
- → What protein alternatives can I use instead of beef?
These pocket tacos are extremely versatile. Great alternatives include shredded chicken, ground turkey, or black beans for a vegetarian option. Simply substitute equal amounts and adjust seasonings to taste.
- → How can I make these pocket tacos kid-friendly?
For a milder version that kids will enjoy, use mild salsa and reduce or omit the taco seasoning, substituting with just a pinch of cumin and garlic powder. You can also let kids customize their own with their preferred fillings and amount of cheese.
- → Why do my tortillas crack when I fold them?
Tortillas crack when they're too cold or dry. Make sure to warm them briefly before folding - either wrap them in slightly damp paper towels and microwave for 30 seconds, or heat each one in a dry skillet for a few seconds per side. Warming makes them pliable and prevents cracking.
- → What sides pair well with these pocket tacos?
These pocket tacos pair beautifully with Mexican rice, refried beans, a simple green salad, or corn salad. For a lighter option, try a cabbage slaw with lime dressing. Don't forget the dipping options like guacamole, salsa, and sour cream!
- → Can I make these without dairy for lactose-intolerant guests?
Yes! Substitute the cream cheese with dairy-free cream cheese alternatives, use plant-based shredded cheese, and brush with olive oil instead of butter. Many taco seasoning mixes are dairy-free, but always check the label to be certain.