
 Save
Save
This hearty Cheddar-Stuffed BBQ Bacon Bombs recipe has become my go-to party appetizer whenever I need to impress guests with minimal effort. The combination of juicy beef, melty cheese, sweet BBQ sauce, and crispy bacon creates an irresistible bite-sized treat that disappears within minutes at any gathering.
I first made these bacon bombs for a Super Bowl party last year, and they've been requested at every family gathering since. My brother-in-law actually called me at 11pm once asking for the recipe because he couldn't stop thinking about them!
Ingredients
- Ground beef 80/20 blend provides the perfect fat content for juicy meatballs that won't dry out during cooking
- BBQ sauce adds sweetness and tanginess while also keeping the meat moist
- Sharp cheddar cheese creates pockets of melty goodness inside each meatball
- Garlic powder and onion powder infuse flavor throughout without the need for chopping fresh aromatics
- Thick-cut bacon works best as it holds its shape while cooking and provides a substantial wrap
- Toothpicks are essential for keeping everything together during cooking
Step-by-Step Instructions
- Preheat Your Cooking Surface
- For oven cooking preheat to 375°F and prepare a baking sheet with parchment paper or foil, ideally with a wire rack on top to elevate the bombs. For grilling preheat to medium heat around 375°F and oil the grates thoroughly to prevent the bacon from sticking during cooking.
- Mix The Meat Filling
- Combine ground beef, BBQ sauce, shredded cheddar, and all seasonings in a large bowl. Use your hands to gently mix everything just until combined, being careful not to overwork the meat which can make it tough. The mixture should look uniform but still feel loose and tender to the touch.
- Form The Meatballs
- Divide the mixture into 12 equal portions approximately 1½ inches in diameter. Rolling the meat between your palms creates the perfect round shape. If you find the mixture sticking to your hands, try wetting your hands with cold water first which creates a barrier between your skin and the meat.
- Wrap With Bacon
- Take each formed meatball and wrap a slice of bacon around it, slightly overlapping the bacon as you go to ensure complete coverage. Secure the end with a toothpick, pushing it all the way through to hold everything together. The toothpick acts as both a structural element and a convenient handle for turning and serving.
- Grill Method
- Place the prepared bombs on your preheated grill and close the lid. Cook for about 15-20 minutes, turning occasionally to ensure even cooking. Watch for flare-ups from dripping bacon fat and move bombs to cooler spots if needed. They are done when the bacon is crispy and the internal temperature reaches 160°F.
- Oven Method
- Arrange the bacon bombs on your prepared baking sheet or wire rack. Bake for 20-25 minutes, flipping halfway through cooking. The bacon should become golden and crispy all around, and the internal temperature should register 160°F when tested with a meat thermometer.
- Rest Before Serving
- Transfer the cooked bombs to a paper towel-lined plate and allow them to rest for about 5 minutes. This crucial step allows the juices to redistribute throughout the meat, resulting in a juicier final product. The brief cooling period also helps the bombs hold their shape when served.
- Serve And Enjoy
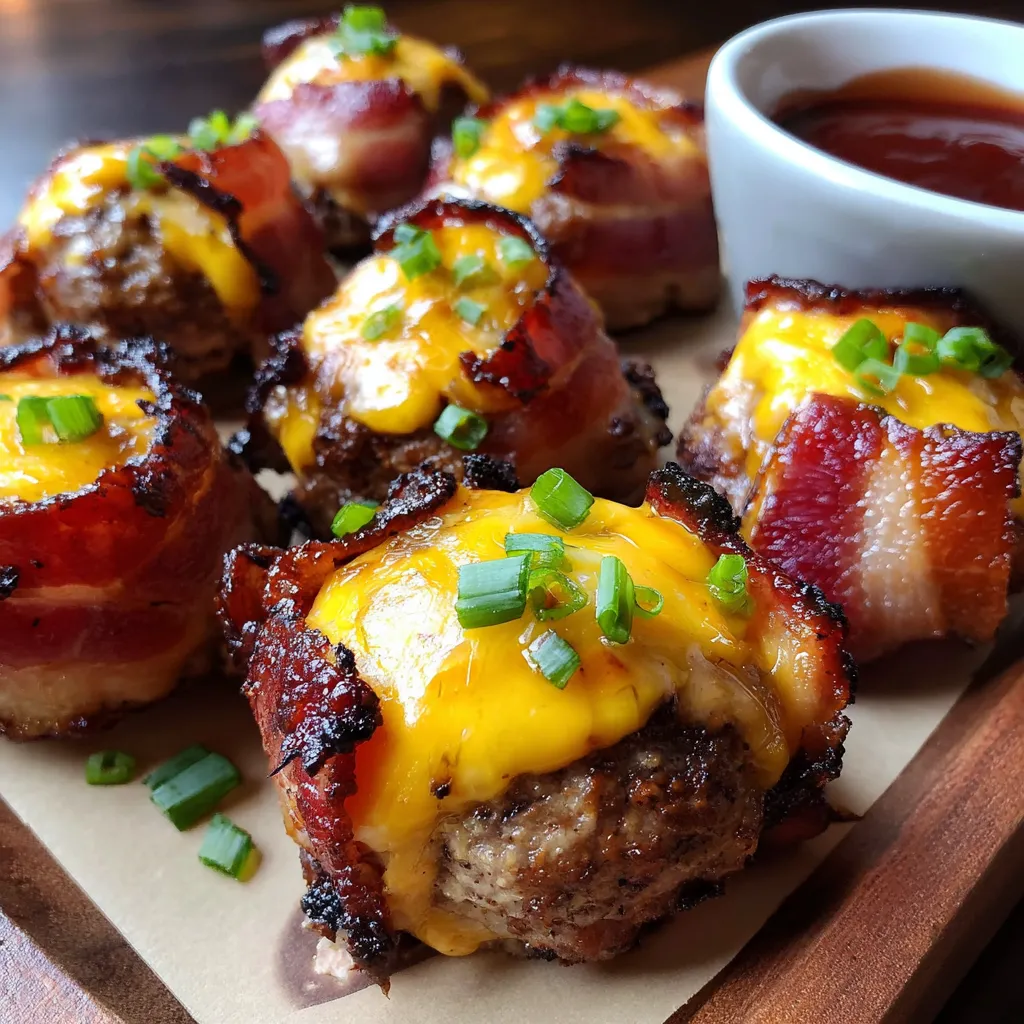
- Remove the toothpicks carefully or warn guests if leaving them in. Arrange on a serving platter and garnish with optional green onions if desired. Provide extra BBQ sauce for dipping to enhance the flavor experience even further.
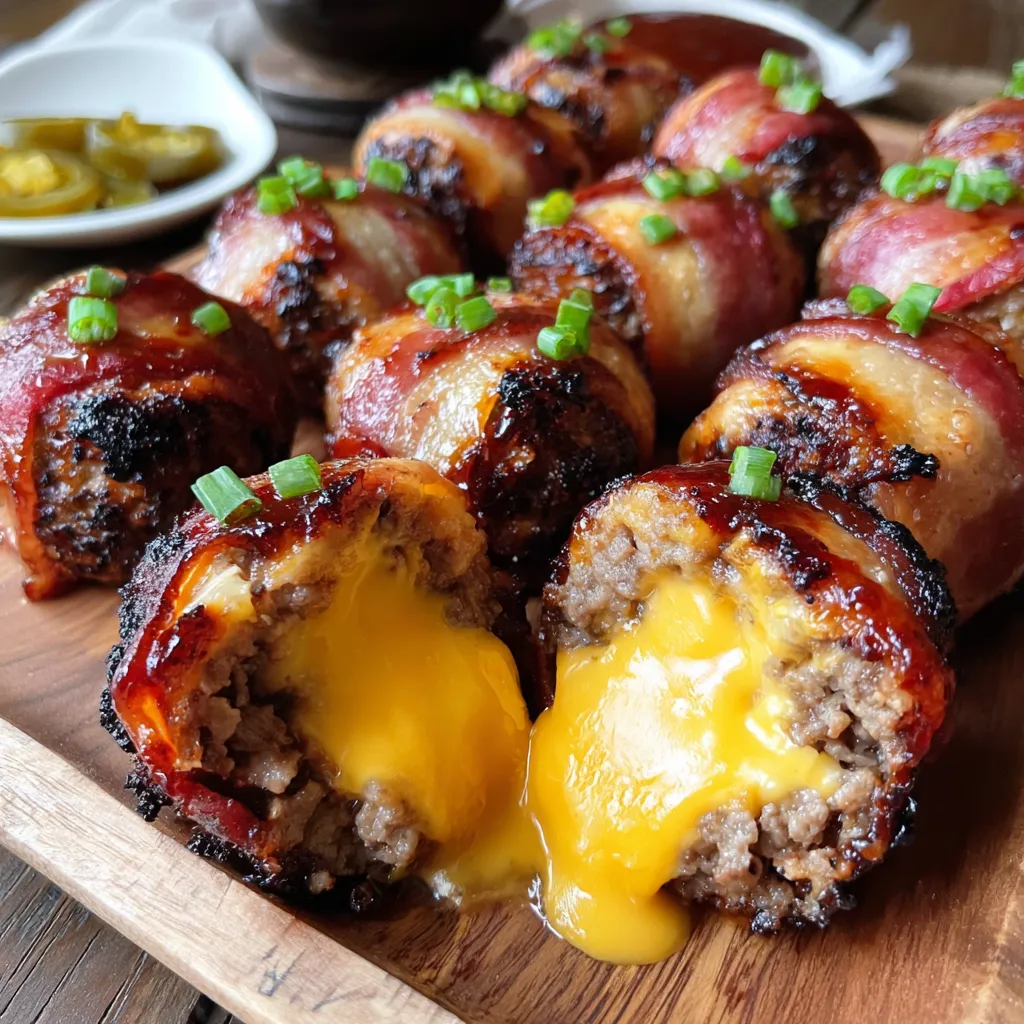
My absolute favorite ingredient in this recipe is the sharp cheddar cheese. I discovered through trial and error that pre-shredded cheese doesn't melt as smoothly, so I always take the extra minute to grate a block of high-quality sharp cheddar. The difference in how it melts and creates those perfect cheese pockets is absolutely worth it.
Make-Ahead Options
These bacon bombs can be assembled up to 24 hours in advance and stored covered in the refrigerator before cooking. This makes them perfect for entertaining as you can do all the prep work ahead of time and simply cook them when guests arrive. If making ahead, wait to insert the toothpicks until just before cooking to prevent the bacon from separating from the meatballs.
Perfect Pairings
The robust flavors in these bacon bombs pair beautifully with lighter sides. I love serving them with a crisp coleslaw dressed with vinegar rather than mayo to cut through the richness. For a complete meal, consider serving alongside roasted vegetables or a simple green salad with vinaigrette. At parties, I arrange them on a platter with pickled vegetables and sliced jalapeños for guests who enjoy adding heat.
Troubleshooting Tips
If your bacon isn't crisping properly, try starting with room temperature bacon rather than cold from the refrigerator. The more even starting temperature helps it cook more consistently. Another trick is to partially cook the bacon in a skillet for about 3 minutes before wrapping—just enough to render some fat but still keep it pliable for wrapping.
Recipe FAQs
- → Can I make these bacon bombs ahead of time?
Yes! You can prepare these bacon bombs several hours in advance and keep them refrigerated until you're ready to cook. This makes them perfect for entertaining when you want to minimize last-minute preparation.
- → How do I know when the bacon bombs are fully cooked?
The bacon bombs are done when the bacon is crispy and caramelized on the outside, and the internal temperature of the beef reaches 160°F (71°C) when tested with a meat thermometer. This usually takes about 15-20 minutes on the grill or 20-25 minutes in the oven.
- → Can I use ground turkey instead of beef?
Absolutely! Ground turkey can be substituted for a leaner option. Just be aware that turkey tends to be drier than beef, so you might want to add a tablespoon of olive oil to the mixture to maintain juiciness.
- → How can I make these spicier?
To add heat, mix cayenne pepper or red pepper flakes into the meat mixture, use a spicy BBQ sauce, or add diced jalapeños to the cheese filling. You could also serve them with hot sauce or spicy BBQ sauce for dipping.
- → What sides pair well with these bacon bombs?
These bacon bombs pair wonderfully with cooling sides like coleslaw, potato salad, or a simple green salad. For a complete meal, serve alongside corn on the cob, baked beans, or grilled vegetables.
- → Can I freeze these bacon bombs?
Yes, you can freeze them either before or after cooking. To freeze uncooked bombs, place them on a baking sheet until solid, then transfer to a freezer bag. When ready to cook, thaw in the refrigerator overnight. For cooked bombs, cool completely before freezing and reheat in a 350°F oven until hot throughout.